 Chatactor Docs
Messenger Integration
Connecting Facebook Messenger to your chatbot lets your bot reply to every message your Facebook Page receives, 24/7, using the knowledge base you already trained. This guide walks you through linking a Facebook Page to your Chatactor chatbot so that customer conversations are answered automatically.
Before we start
- You need a Facebook Page for your business. A personal Facebook profile cannot be connected — the chatbot replies on behalf of a Page.
-
You must be able to manage that Page with the personal Facebook account you log in with.
- Open your Meta Business Suite and log in.
- Navigate to Settings > People or Page access and make sure your account has full control of the Page.
- Make sure your chatbot already has data sources added and trained. Without a knowledge base the bot will not have anything to answer from — you can add sources from the Data Source tab of your chatbot.
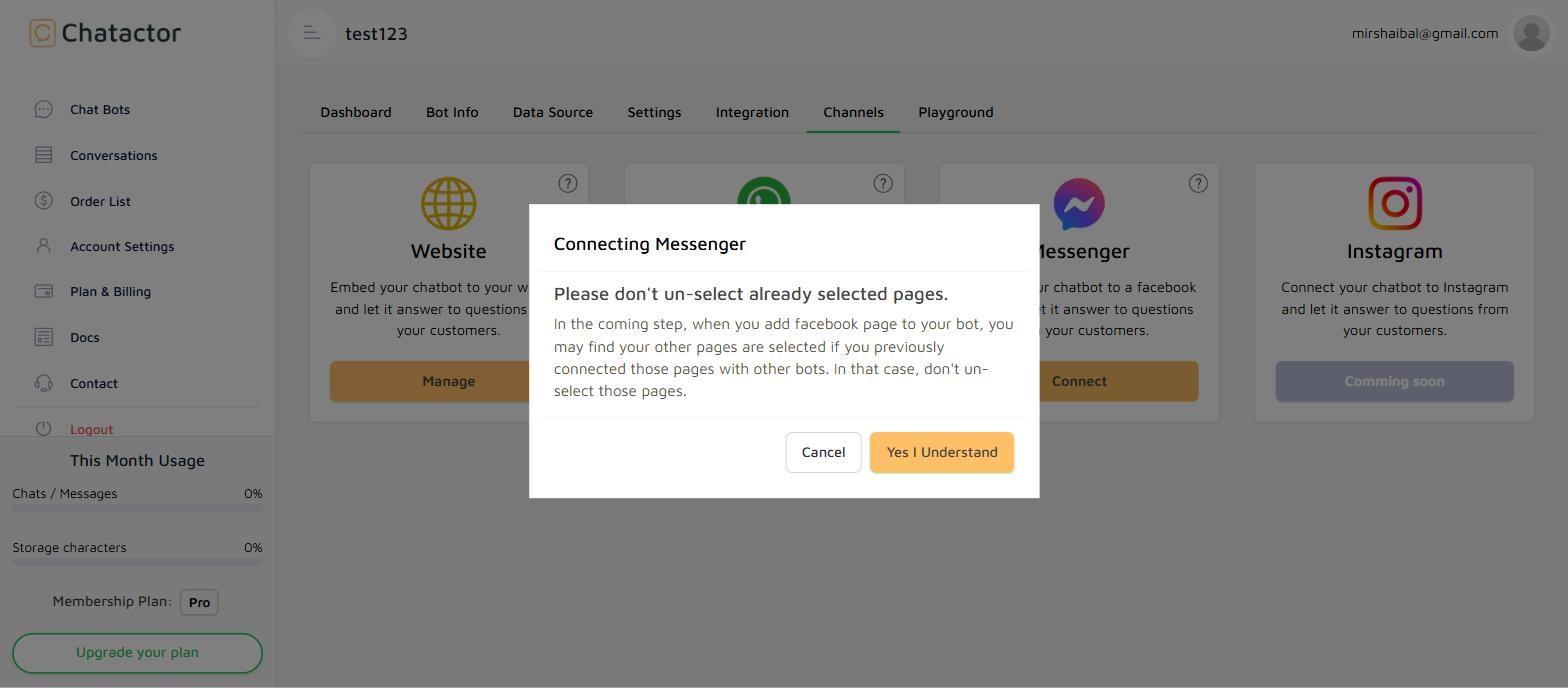
- Important: if you have already connected some Facebook pages to other chatbots, do not un-select them during the connection step. Facebook shows all your pages in one selection list, and un-selecting a page there will disconnect it from the chatbot it currently belongs to.
Start Integration
-
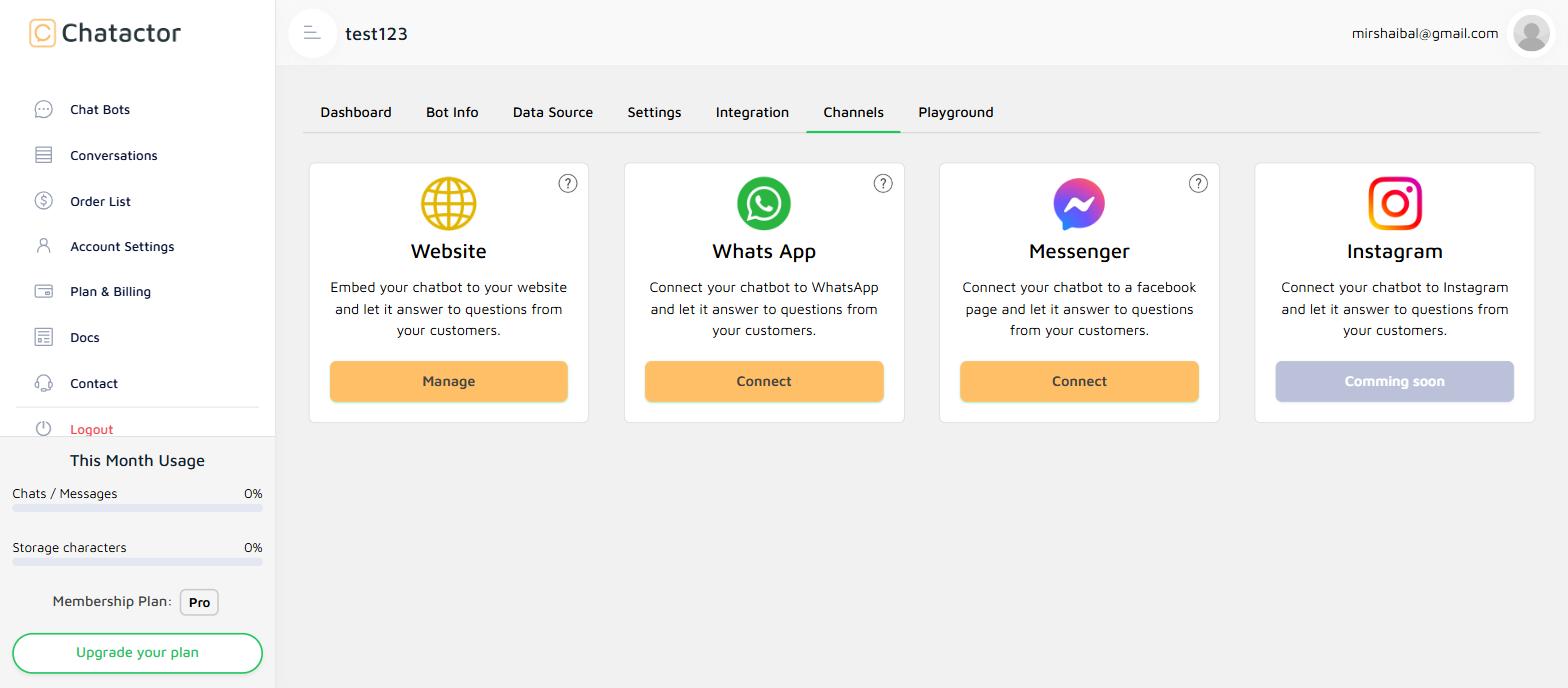
Open your chatbot, navigate to the Channels tab and click Connect under Messenger.
-
Read the Connecting Messenger notice and click Yes I Understand. This is the reminder about keeping your previously connected pages selected.
- Log in with your personal Facebook account — the one that manages the Page you want to connect.
- Select the Facebook Page you would like your chatbot to answer for. If pages are already selected from an earlier connection, leave them selected and simply add the new one.
- Keep all of the requested permissions enabled and continue. Chatactor needs the messaging and page access permissions to read incoming messages and reply on behalf of your Page. If you turn any of them off, the chatbot will not be able to respond.
- Confirm to finish, and you will be returned to Chatactor.
-
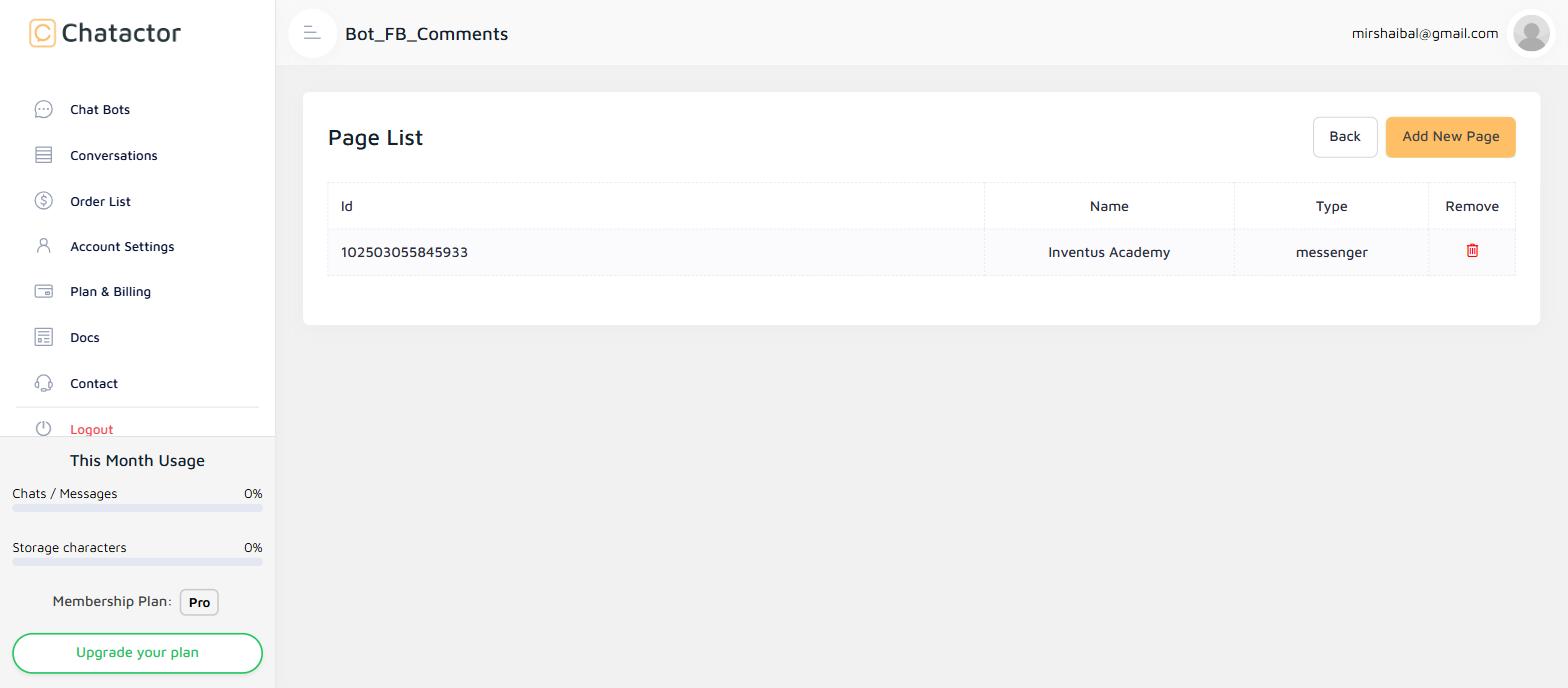
Your connected page now appears in the Page List. You can connect more pages later with Add New Page, or disconnect a page using the remove icon.
After the integration
- Send a message to your Facebook Page from another account to test that the chatbot replies.
- All Messenger conversations are recorded and can be reviewed from the Conversations page of your dashboard.
- If you are selling through Facebook, open the Settings tab of your chatbot and apply the F-Commerce Bot behaviour template. This tunes the chatbot to take customer orders directly inside Messenger, and any orders it captures will show up under Order List.
- A single Facebook Page should be connected to only one chatbot at a time, otherwise it is not clear which bot should answer.
Congratulations! You finished integrating your Chatactor's chatbot to Messenger, your chatbot is now ready to reply to all the messages received through your Facebook Page!